Knowledge of AOT Queries is something that all developers should posses, both in terms of functionalities as well as how to effectively use these. In this first part of a two-part blog series, I will cover most of the functionalities that a developer might need to use when implementing these.
What are AOT Queries?
When thinking about data manipulation in X++ we can see that there are a few fays to create your queries. These queries can either be created using the normal while/select statement or by building a query object. The query object can either be created using the AOT or by using the Query class (QueryBuildDataSource, QueryBuildRange, etc.).
Queries created as an AOT element are a reusable Query object which is created through the element designer. Using AOT queries can have many advantages but also has some disadvantages:
Advantages
- Re-usable: Queries can be defined once and re-used in different instances. These can also be referenced and executed through X++ code.
- Code maintainability: The lack of code when creating AOT Queries improves code maintainability and makes it easier for developers of all experience levels to use.
- User interaction: Queries can be used as an interface which the user can interact with in some service classes (using the SysOperations framework) or as a way for the user to filter data before viewing it in a form. These topics will be covered in detail in the second post in this series.
Disadvantages
- AOT Queries can have restricted functionality when working with tables which make use of ValidTimeState keys. Since there is no property where the valid date key can be defined, the query is only able to query data which is currently active. In the second part of this series, this too will be covered more in detail.
- Filter or query expressions might be harder to define than when using normal while/select statements.
- Testing of queries requires additional elements to be created.
Creating AOT Queries
AOT queries can be created in the same way that all other elements are created: through a Visual Studio project. To create a query, add a new item to the project, select the Data model section, select query and give a name to the query:

Once the query is created, there are a couple of properties which need to be defined:
Query Type
This determines the join type which is used in the query data sources. There are two options available for this selection:
- Join: Joins the query data sources using one of the join types (inner, outer, exists and notexists join).
- Union: Performs a union on the different data source. This comes with a set of restrictions in terms of the fields which can be selected, both in amount and the types of the fields.
Title & Description
When these are not defined a best practice warning will be thrown. Other than this fact, these values will be shown on the User interface when the user is manipulating the data sources and ranges to be used in the query.
Query Datasources
The datasources defined in a query control where the data is acquired from. Within a query there can be several datasources defined, all of which joined to each other depending on the JoinType specified at the query level.
To create a new datasource, right click on the data sources node and click “New data source”:
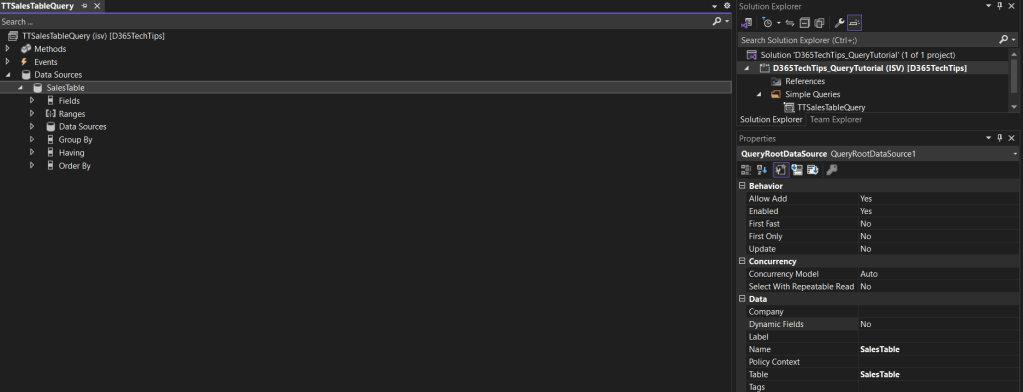
At the datasource level, there are a few important properties that need to be defined:
- Table: This defines the table where the data will be acquired from. Once this is defined, the data source name will automatically be modified to reflect the name of the table which is defined in this property.
- Dynamic fields: The default value for this is Unselected but a different value must be defined here. When this property is turned on, all fields from the defined table will automatically be selected without the possibility of removing fields which will not be used. When this is set to No, the fields to be selected will need to be manually defined by a right click on the Fields node and selecting the field which is required in the properties section. It is important to keep in mind that selecting all fields from a table might hurt performance, especially when using several joined tables, all of which contain a lot of fields.

Aggregations based on fields can also be added here. Functions like Average, Sum etc. can be created in the same way.
Datasource relations
A datasource can have other datasources related to it. To create this relationship between datasources, open the “Datasources” node within a datasource, right click and select “New datasource”.
The same properties specified above regarding datasource properties will also need to be defined here. At this point, the join mode to be used between the datasources needs to be defined. This is dependent on the JoinType property which was defined on the query. In addition to this, the relationship between the datasources will also need to be defined. In order to create this, right click on the “Relationships” node and select “New relationship”.

On a relationship, the following properties must be specified:
- Join Data Source: Defines the datasource which this datasource should be related to.
- Field: Defines the field in the related datasource to be used in the join.
- Related field: Defined the field in the current datasource to be used in the relationship.
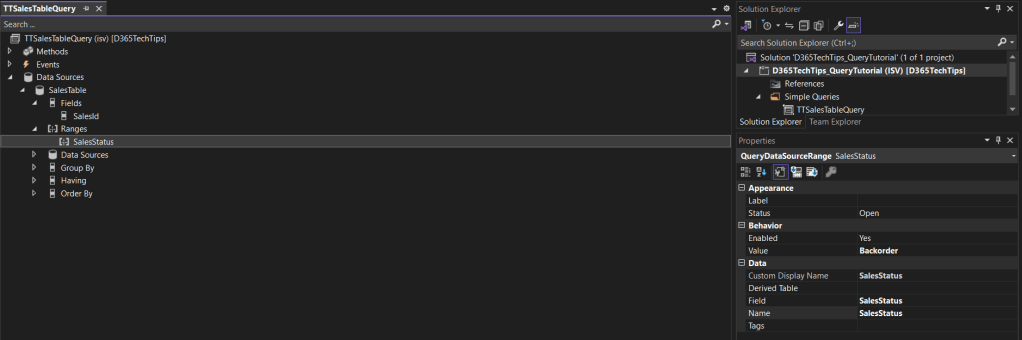
Query Ranges
Query ranges are used to filter the data returned by the data source. To create a range, right click on the “Ranges” node in a data source and select “Add range”. At this point, the field to set range on as well as the value to be used in the filter criteria should be set:
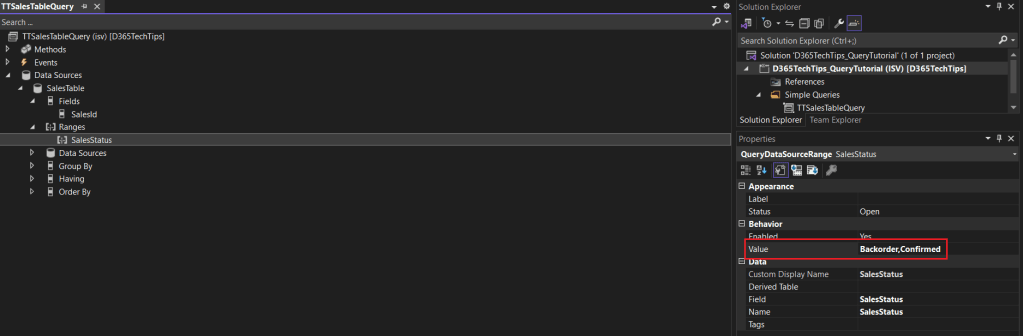
Several conditions can be set on the same data source. The default behaviour for different ranges on the same data source will be to perform an “AND” operation between them all. If an “OR” operation needs to be performed, the values within the query range can be set with a comma delimited string where all the values to be used in the filtering criteria should be specified.
Testing your queries
One of the downsides of working with AOT queries is the inability to execute these in order to validate the results of the query. In my experience, the best way to test the developed queries is to create a view which is based on a query. This will effectively populate the view with data returned by the query hence, providing the developer with a way to visualise the data. After creation, the developer can use both the table browser or query the data directly in SQL.
This concludes the first post in this series. In this blog post, the basic functionality of AOT Queries was covered. In the second post as part of this series, more complex query functionalities will be covered with the intention that the full series will cover all functionalities which can be used in an AOT Query.

Leave a comment